The curing process...
To ensure your oven doesn't crack, you will need to cure it.
Once completed the oven should be left to dry for a week. This will ensure that the majority of the moisture left in the mortar should have evaporated, leaving a solid structure.
Curing...
The idea is to gently slow cure the oven to ensure the integrity of the oven isn't compromised.
Step 1...
I bought a set of three various sized candles from Asda for £5.
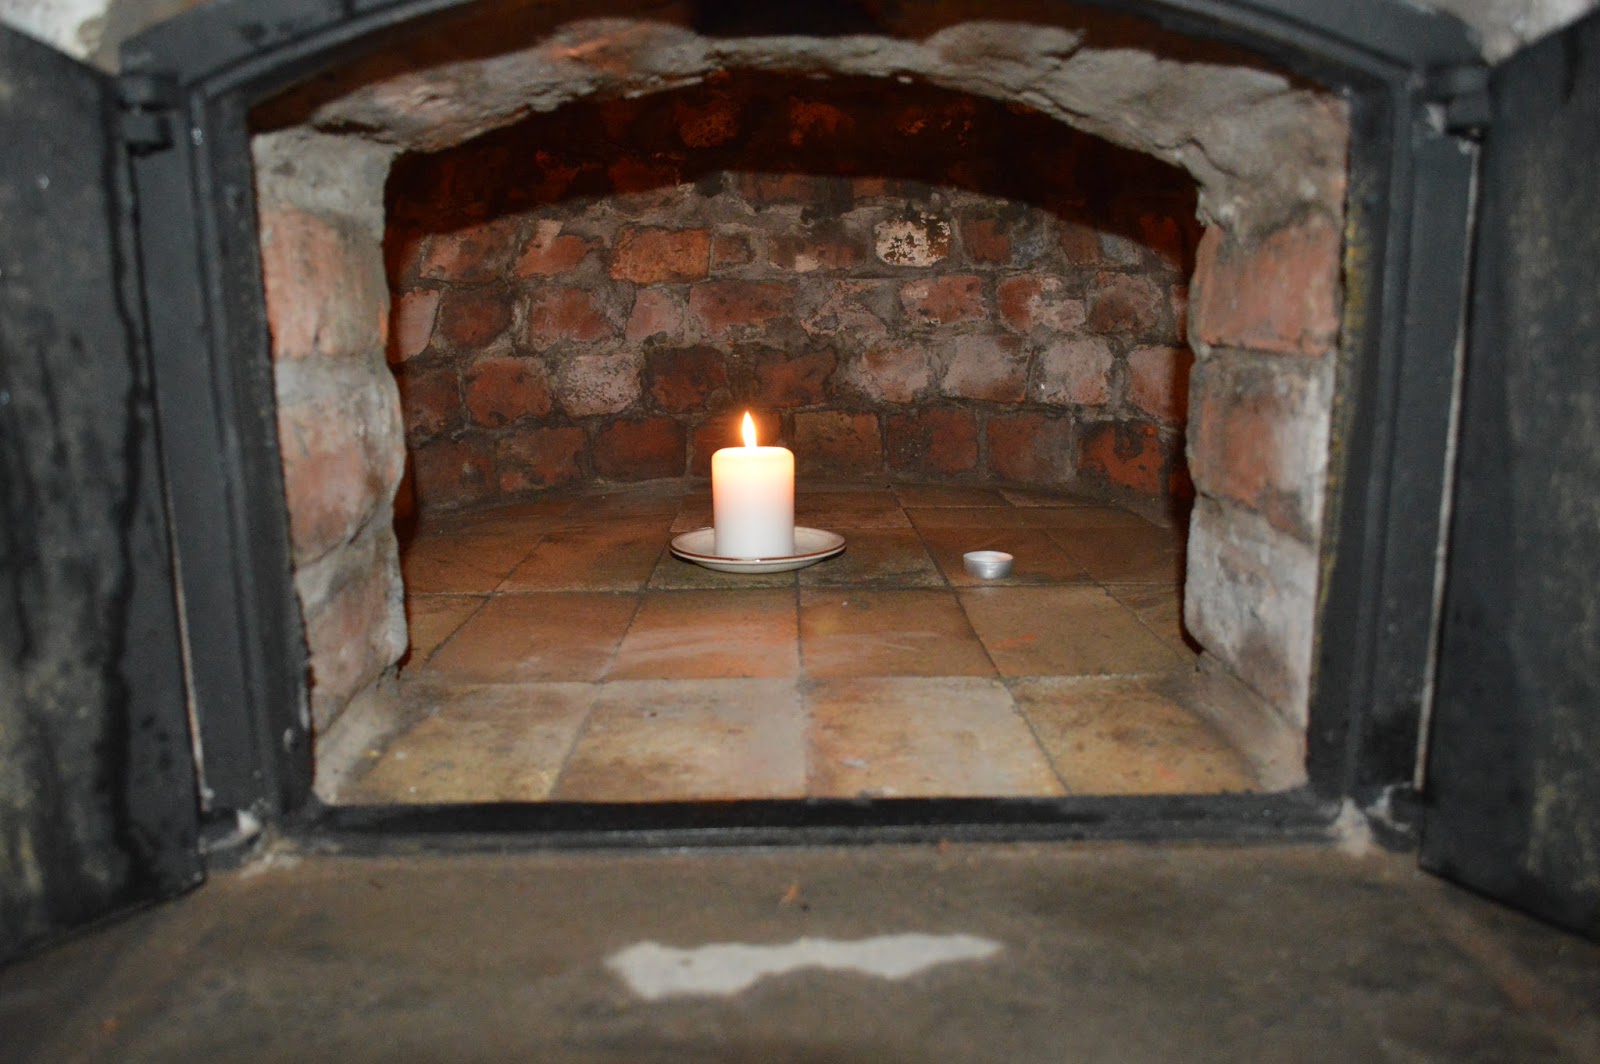
Place the smallest candle in the centre of the oven, and close the doors slightly, but leave them open enough for oxygen to get in and any remaining moisture to be allowed to filter out.
These candles burn for approx. 24 to 28 hours. I placed mine in the oven in the evening. When I checked it the following morning it was still burning. I placed my hand in the oven and could feel a warm heat in all parts of the oven, but a very mild heat, which is what you want.
Step 2...
Once the first candle has expired, place the second one in the oven.
Step 3...
Repeat the above process with the largest candle.
Once the candles have all been burnt, you can now start to light fires in the oven.
The secret here is to start small and build the heat up over a few days until you reach peak operating temperature. If you don't take your time with this process, your oven may crack and all your good work could be ruined.


After my final fire, the oven stayed warm for 3 days. I took advantage of this cooling period and filled the oven with logs for future burns. The logs were quite heavy and wet when placed in the oven, but were nice and dry and ready to use once the oven had cooled. Your basically kiln drying your logs for future use and using the residual heat to do so. How Eco friendly is that...
Ensure that before you place the logs you want to dry in the oven that you remove all of the ash and any remaining embers or you may end up with another fire.
Make sure you thoroughly remove all ash, remaining bark etc left from your log drying process from the oven before you close it up. The next time you use it, it will be ready to go.
The oven is self cleaning every time you use it, so no need to clean it with any chemicals. I just brush out all the ash, wipe it over with a damp cloth to remove any dust and off you go again.


I'm very pleased with the final product, and would certainly do it all over again.
The only thing I think I would change in the whole build, would be not to use fire bricks at all. Providing you ensure you use clay bricks, which have been fired at high temperatures during the hardening process, these will be more than sufficient, and will save you money. Clay bricks are at least half the price of fire bricks.
Well, that's about it I suppose.
Have a go, you'll really enjoy it, and you'll end up with a garden feature that will stand the test of time, definitely a talking point, and should give you hours of uncomplicated use.
Just waiting for some really nice weather to use mine.
Thank you for reading this, and hope it's been of some use to you. I'll post a photo of our first real use when it's available.
Dylan
To ensure your oven doesn't crack, you will need to cure it.
Once completed the oven should be left to dry for a week. This will ensure that the majority of the moisture left in the mortar should have evaporated, leaving a solid structure.
Curing...
The idea is to gently slow cure the oven to ensure the integrity of the oven isn't compromised.
Step 1...
I bought a set of three various sized candles from Asda for £5.
Place the smallest candle in the centre of the oven, and close the doors slightly, but leave them open enough for oxygen to get in and any remaining moisture to be allowed to filter out.
These candles burn for approx. 24 to 28 hours. I placed mine in the oven in the evening. When I checked it the following morning it was still burning. I placed my hand in the oven and could feel a warm heat in all parts of the oven, but a very mild heat, which is what you want.
Step 2...
Once the first candle has expired, place the second one in the oven.
Step 3...
Repeat the above process with the largest candle.
Once the candles have all been burnt, you can now start to light fires in the oven.
The secret here is to start small and build the heat up over a few days until you reach peak operating temperature. If you don't take your time with this process, your oven may crack and all your good work could be ruined.
Various shots of the candles
First small curing fire
After my final fire, the oven stayed warm for 3 days. I took advantage of this cooling period and filled the oven with logs for future burns. The logs were quite heavy and wet when placed in the oven, but were nice and dry and ready to use once the oven had cooled. Your basically kiln drying your logs for future use and using the residual heat to do so. How Eco friendly is that...
Ensure that before you place the logs you want to dry in the oven that you remove all of the ash and any remaining embers or you may end up with another fire.
Make sure you thoroughly remove all ash, remaining bark etc left from your log drying process from the oven before you close it up. The next time you use it, it will be ready to go.
The oven is self cleaning every time you use it, so no need to clean it with any chemicals. I just brush out all the ash, wipe it over with a damp cloth to remove any dust and off you go again.
This is what the inside of the cured oven should like like after the last curing fire
I've added an extension piece to the flu to allow the heat to rise above the oven
I'm very pleased with the final product, and would certainly do it all over again.
The only thing I think I would change in the whole build, would be not to use fire bricks at all. Providing you ensure you use clay bricks, which have been fired at high temperatures during the hardening process, these will be more than sufficient, and will save you money. Clay bricks are at least half the price of fire bricks.
Well, that's about it I suppose.
Have a go, you'll really enjoy it, and you'll end up with a garden feature that will stand the test of time, definitely a talking point, and should give you hours of uncomplicated use.
Just waiting for some really nice weather to use mine.
Thank you for reading this, and hope it's been of some use to you. I'll post a photo of our first real use when it's available.
Dylan
The candle makes it look almost shrine like :)
ReplyDeleteIt really does achieve the 'earthed' look, which I assume will make it look more a part of the garden.
I am very much looking forward to testing it out in July :)