The frost has finally gone....The Holiday is done and dusted.....so lets build
As the title suggests, I've been waiting for the frost to finally go so that I can start the oven.
Prior to that we had a lovely cruise in the Canaries, it was very relaxing and gave me plenty of time for thought in relation to my next course of action.
As with all good builds, you start at the bottom and work up.
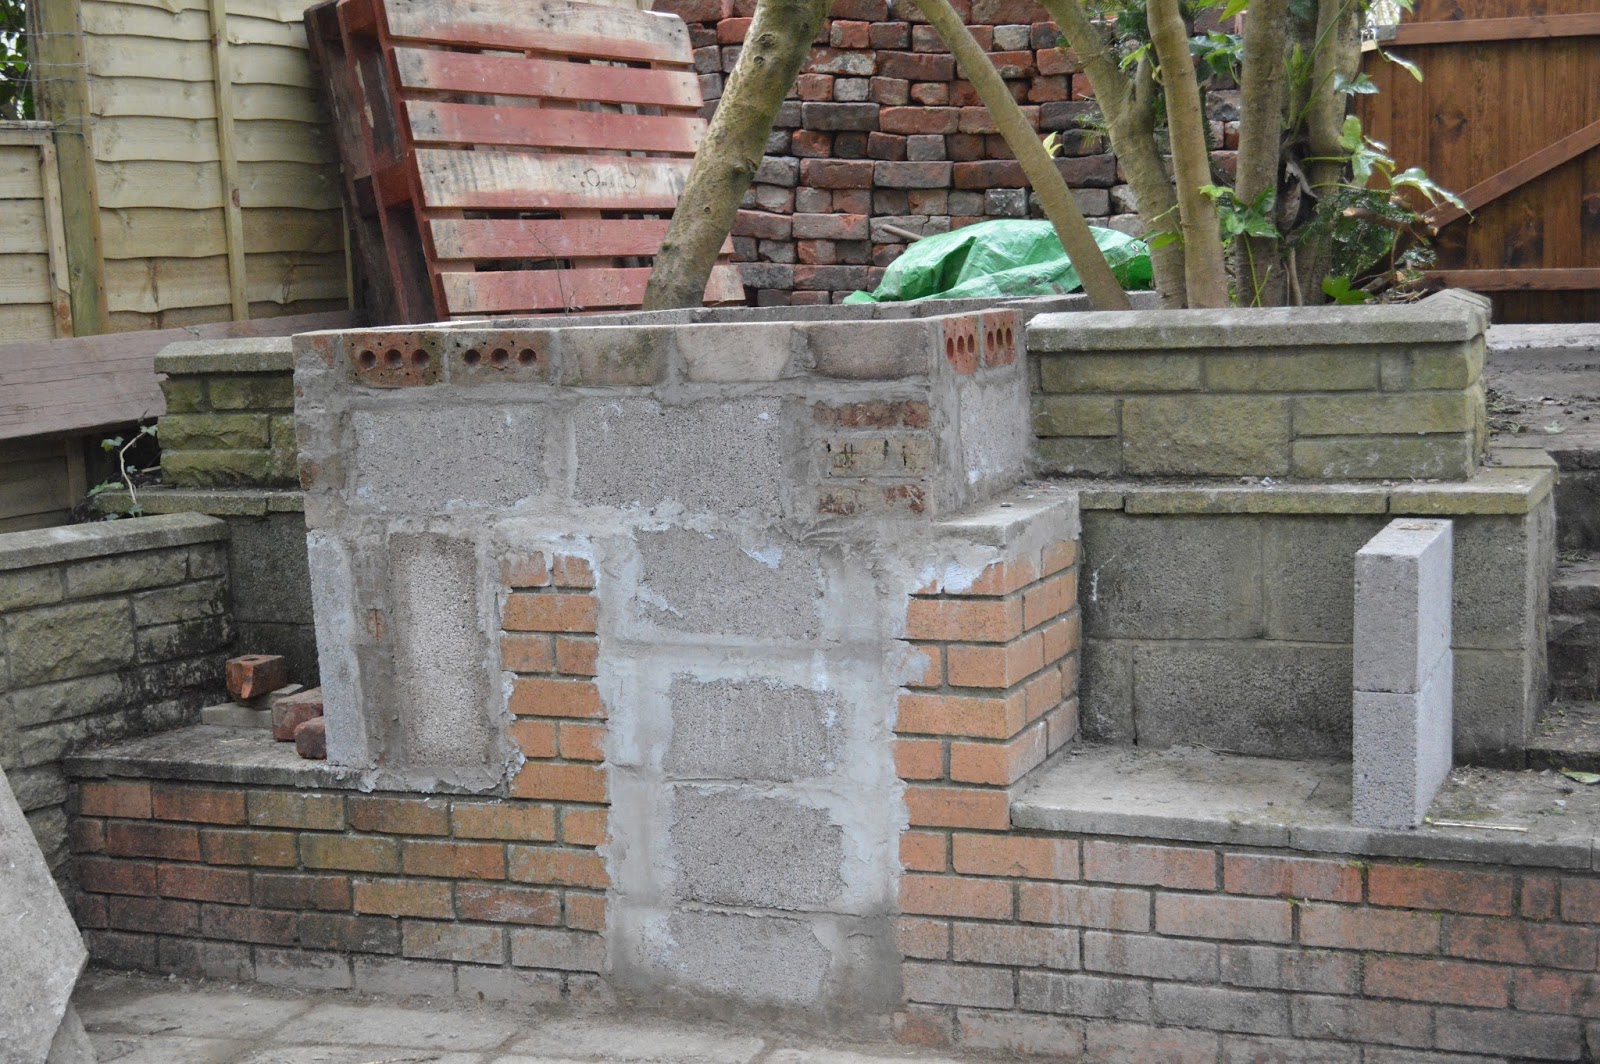
I've spent the last few days building the basic structure that will hold the weight of my oven. As you can see from previous photo's, I'm very lucky in that I've already got an old BBQ area to work from, so I've utilised that and built around it to form my base.
I've used a combination of breeze blocks and some old bricks I had laying around to form this. This enabled me to build the base in 2 days. The most difficult bit was preparing the ground at the rear of the oven which was soil based.
I dug footings for the rear breeze blocks, laid a layer of course chipping, and then completed the footings with a layer of cement approx. 3 inches thick with a 3 to 1 ration cement and sand mix. This seems to have done the job admirably.
On top of that I placed the breeze blocks and cemented them in.
All seems good so far....
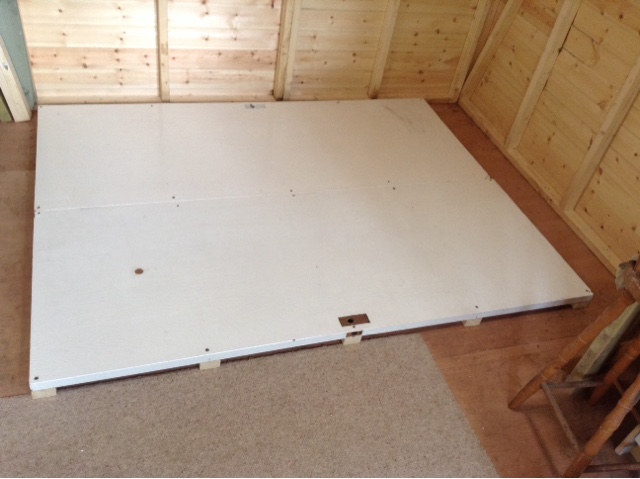
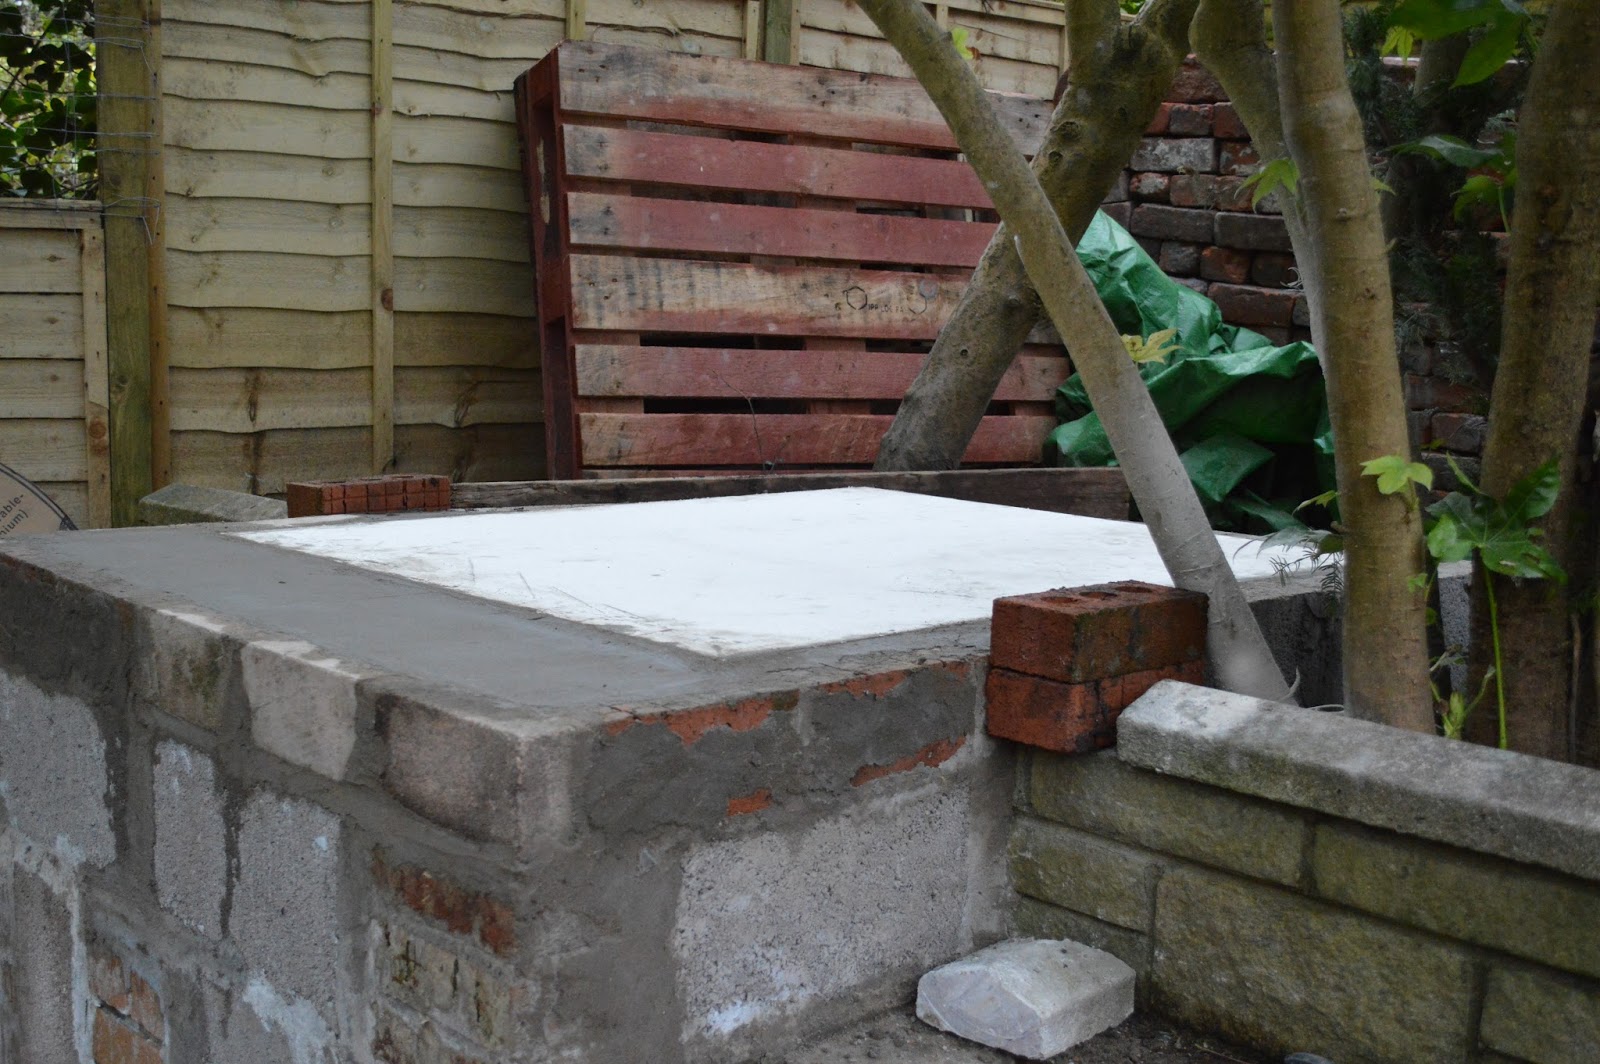
I then left the structure to dry for 24 hours before filling the interior of the base with small chippings. I packed them down and my next job will be to lay the first of two layers of concrete to form the base.
As with any build, getting the levels right in the first instance can be a nightmare, and this was no exception. I suspect I must have spent at least two to three hours measuring, measuring again and on some occasions even a third time to ensure all is level and square. It's worth taking your time in this area because it will ultimately save you a great deal of time...especially if you discover you have to re-align things AFTER the cement has dried.


Until next time.....
As the title suggests, I've been waiting for the frost to finally go so that I can start the oven.
Prior to that we had a lovely cruise in the Canaries, it was very relaxing and gave me plenty of time for thought in relation to my next course of action.
As with all good builds, you start at the bottom and work up.
I've spent the last few days building the basic structure that will hold the weight of my oven. As you can see from previous photo's, I'm very lucky in that I've already got an old BBQ area to work from, so I've utilised that and built around it to form my base.
I've used a combination of breeze blocks and some old bricks I had laying around to form this. This enabled me to build the base in 2 days. The most difficult bit was preparing the ground at the rear of the oven which was soil based.
I dug footings for the rear breeze blocks, laid a layer of course chipping, and then completed the footings with a layer of cement approx. 3 inches thick with a 3 to 1 ration cement and sand mix. This seems to have done the job admirably.
On top of that I placed the breeze blocks and cemented them in.
All seems good so far....
I then left the structure to dry for 24 hours before filling the interior of the base with small chippings. I packed them down and my next job will be to lay the first of two layers of concrete to form the base.
As with any build, getting the levels right in the first instance can be a nightmare, and this was no exception. I suspect I must have spent at least two to three hours measuring, measuring again and on some occasions even a third time to ensure all is level and square. It's worth taking your time in this area because it will ultimately save you a great deal of time...especially if you discover you have to re-align things AFTER the cement has dried.
Until next time.....
Comments
Post a Comment